
Every year our buddy Shawn hosts an amazing Halloween party but while I love Halloween, it’s always harrowing to try and find a costume for the event, especially since a few of my buddies are legit costume designers and cosplayers. The first year we went, I lamed out and just bought an overpriced spandex Deadpool outfit that highlighted my lack of definition and was a pain to get in and out of. Last year, I stepped up my game and learned how to bend acrylic to make a badass version of Snake Eye’s ninja visor.
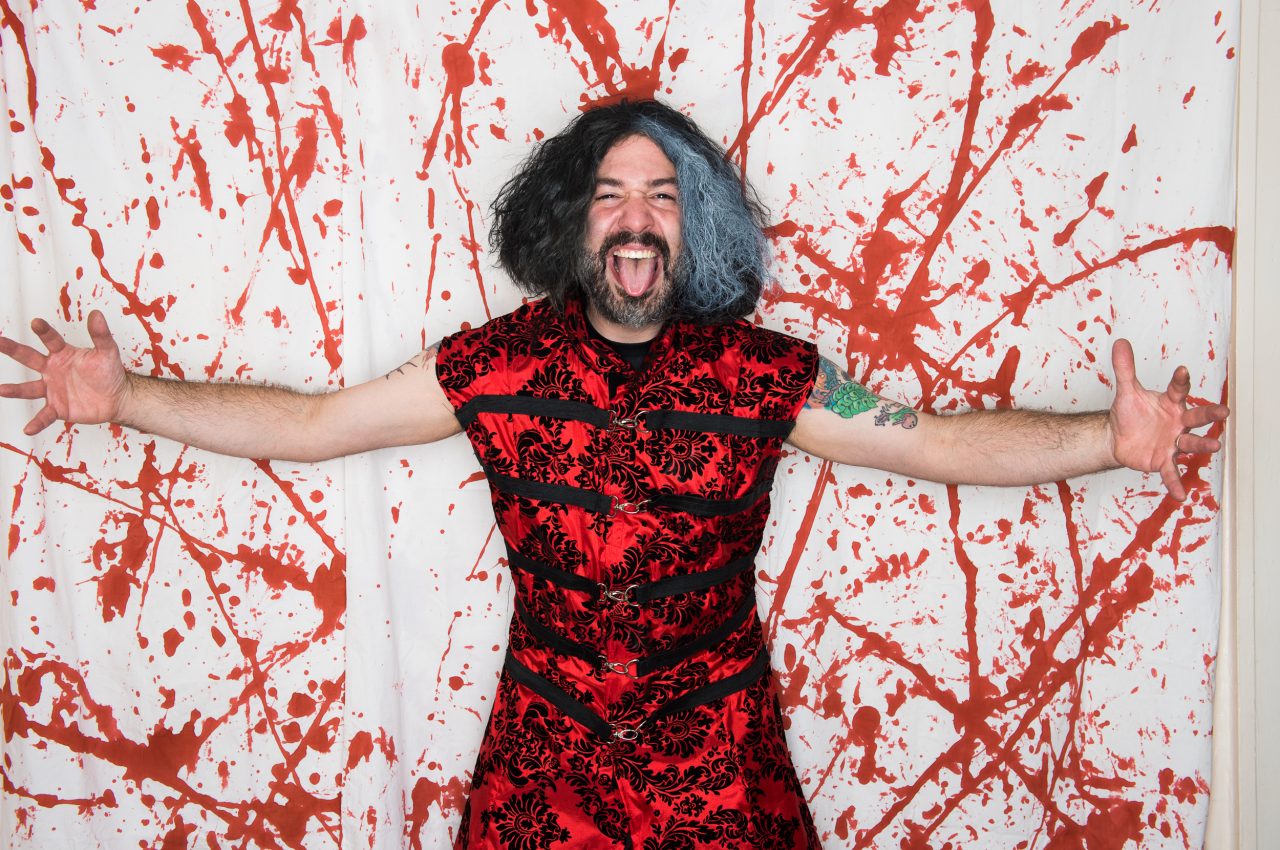
This year I decided to be the greatest wrestler of 2016 — Broken Matt Hardy — partially because he kicked so much ass, but also because I wouldn’t need to dye my beard. But there’s one small problem, I needed to actually make a Broken Matt Hardy Halloween costume. After watching a ton of Impact Wrestling, I was determined to make his traditional outfit — a red damask robe/coat that screamed wrestling warlord (no, not one half of the Powers of Pain Warlord). The tough part was that I had no idea how to go about making an outfit. Up until now, I either bought everything or used my mild technical ability to hone an accessory.
Choose your path: build or buy
While attending this year’s New York Comic Con, I ran into a group of Warcraft cosplayers, one of whom was wearing Matt Hardy’s exact outfit. I immediately struck up a conversation and asked him how he made it. He admitted that he had no idea who Broken Matt Hardy was, but told me that he bought the robe from Shrine of Hollywood 10 years ago and that it should still be available. Lo and behold, it does exist — and it costs $315 before shipping. That’s way too rich for my blood, especially since I would never wear it again and would forget to list it on eBay. That said, if you want to buy your own replica Broken Matt Hardy jacket — also known as the Hellraiser warrior’s cossack — you can skip everything I wrote below and just order one.
Plan of attack
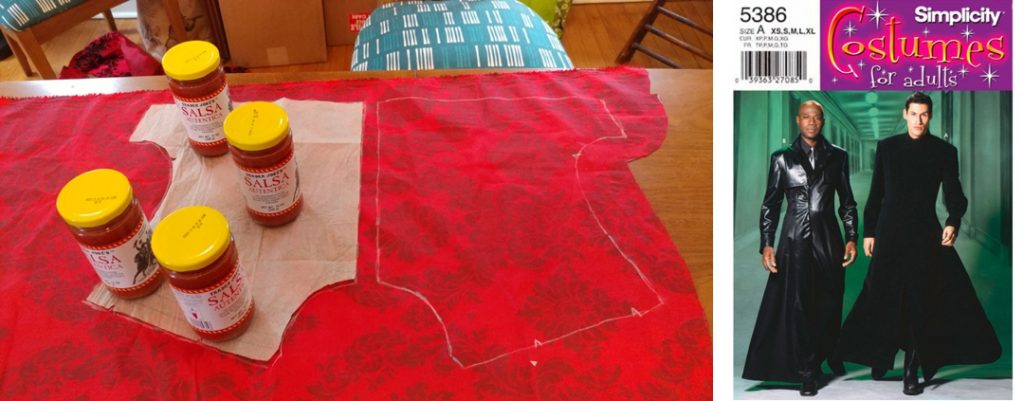
So back to my story. My original plan was to take apart my 12×12 foot damask photo booth backdrop and use that as the fabric, but it is super thick and I really didn’t want to sacrifice it with two weddings left in the year. A week of research later and I landed on a similar damask fabric from fabric.com that was in my price range and was close enough in style to Matt’s outfit. Then came problem #2, I needed a sewing machine. For that, I hit Amazon and bought the Brother XL2600I Sew Advance for $44 after a gift certificate. It retails for $79, which is worth it if I ever decide to sew again.
A day or so later, the fabric and sewing machine arrived and I hit Michael’s up for some thread and scissors. Problem #3 was that I hadn’t used a sewing machine since eight grade home ec class (what the hell does home economics even mean?). Problem #4 was that I really thought I could freehand a pattern based off of one my Banana Republic shirts. Fail all around. The next day, I spent hours combing through YouTube and eBay trying to find tutorials and patterns. YouTube was a wealth of knowledge for how to set up the sewing machine and got the general basics down. After, lurking through a half dozen cosplay forums, I found a few threads that recommended the Simplicity Matrix duster (#5486) as a good choice for a trench/vampire/goth jacket. The bad news was that it was out of print (or deleted); the good news is that there was one on Amazon for $39.
What the hell am I doing?
Twenty four hours later, I had my pattern, fabric, a semblance of how to use a sewing machine and a whole day off of work. It took forever to cut the patterns out and even longer to transfer them to the fabric. Sewing patterns use an insane amount of jargon, like “basting” that threw me for a loop and I grossly under guessed the amount of fabric I would need. So I had to make modifications.
The Simplicity Matrix pattern required four front sections for more of a layered look. I ditched two of them since Matt Hardy’s outfit looks more tailored. I also nixed the sleeves all together since the original doesn’t have any. Hemming the sleeves, however, sucked big time. I don’t know if it was luck or just nascent talent, but I was able to stitch the back yoke, back panels, side panels and front panels pretty quickly to create the base of the outfit. It actually looked pretty good after seven hours of work and, more importantly, it fit. The fabric I chose to use was more like a table cloth, so any stitching errors were easily visible to sewing master, but you can’t tell unless you really care. The collar was a real pain in the ass, as I didn’t know that you needed three copies of it (two for front and back and one as a filler for stiffness). I had to scrap my first attempt and then modify how I attached it because I wasn’t adding the extra front layers to cover the raw seams.

Finishing touches
To finish it off, I ordered a few feet of one-inch elastic from Amazon for the five front buckles. I also picked up five fancy one-inch clasps and matching d-rings. The buckles and elastics, however, are simply for show, as I figured that if I actually used them to secure the front of the jacket, they would pull and bunch up the front of the coat and sleeves. Instead, I used velcro to hold the front of the jacket in place and latched the clasps together over the overlapping center seam.
For a wig, we started with an Edward Scissorhand’s head piece, but I thought it looked too messy to look like Broken Matt Hardy’s meticulously frizzy curled locks. After some hunting, I actually found a Seth Rollin’s replica wig for $20 that I spray painted black before adding a Dave Vanian/Toecutter skunk streak.
All in, becoming Broken Matt Hardy set me back about $186, but I get to keep the sewing machine to sew my punk rock patches on my jacket. Hell, I might even show up to Matt Hardy’s December House of Hardcore appearance and see if he deletes me in person. I can’t wait.
Broken Matt Hardy Cosplay Components
- Brother XL2600I Sew Advance Sewing Machine: $45 (after $45 gift certificate)
- Miss U Hair Men Wrestler Wig Synthetic: $19
- Simplicity 5386 DUSTER Matrix Style Costume: $39
- 1″ Wide 5 Meters Long Black Springy Stretch Knitting Elastic Band:$9
- Amanaote 1 Inch Inside Diameter D Ring Assemble Lobster Clasps Buckle Hook: $11
- Flocked Damask Taffetta Red/Black fabric: $18
- Random sewing crap: $45

